


Implementing a site-wide RSS feed in Gatsby can be done very easily. I can recommend implementing the official Gatsby feed plugin.
In this tutorial, I want to show you how you can implement an RSS feed for a specific URL or page. In my case, the data for the RSS feed was provided to me via a REST API endpoint that returned JSON.
💡This tutorial assumes you already have a Gatsby site setup and running. If you are new to Gatsby, I can highly recommend the Gatsby docs to get started.
Here are the steps that I am going to walk you through in detail in this tutorial:
— Test your API endpoint with `Postman`
— Call JSON in /gatsby-node.js with `Axios`
— Shape JSON by turning it into a JavaScript Object
— Convert the new object to RSS XML with `jstoxml`
— Use fs from Node.js to create a new file rss.xml
— Test your new RSS feed with an RSS validator
Without further ado, let’s get started 🙌
The first step is to call the API endpoint and make sure that it returns the correct JSON. Postman is an excellent tool to test your REST API endpoint.
It is as easy as creating a new ‘GET’ Request and inserting the endpoint. If your endpoint requires authentication you can read more about how to authenticate in Postman in the Postman Learning Center.

Gatsby APP
/gatsby-node.js
Once you verified that the correct data is being returned from the API endpoint, navigate to your /gatsby-node.js file. This file contains code that runs when building your site. You can use Gatsby Node APIs to add code and control your sites’ data. For my RSS feed, I am going to use the OnPostBuild API to call my code at the end of the build process, after everything else has been built.
The first step is to call your API data using Axios. You can install Axios by running $ npm install axios in your terminal, and then you require it at the top of our file:
const axios = require('axios').default;
exports.onPostBuild = async () => {
  const rssFeed = () => axios.get('<your API endpoint>');
  const res = await rssFeed();
  // add code below into this function in chronological order
}
To test your implementation, build your app with
$ gatsby build && gatsby serveto run a production build. You can also console.log your API endpoint results to make sure that your code is working.
JSON to XML
Shaping JSON
The syntax for an RSS feed is very specific XML. The code below is taken from this article W3Schools RSS. It shows the XML syntax that you require for the RSS feed to be valid 🍄
<channel>
  <title>W3Schools Home Page</title>
  <link>https://www.w3schools.com</link>
  <description>Free web building tutorials</description>
  <item>
    <title>RSS Tutorial</title>
    <link>https://www.w3schools.com/xml/xml_rss.asp</link>
    <description>New RSS tutorial on W3Schools</description>
  </item>
  <item>
    <title>XML Tutorial</title>
    <link>https://www.w3schools.com/xml</link>
    <description>New XML tutorial on W3Schools</description>
  </item>
</channel>
As you can see in the example above, we need keys that are called ‘item’ and then within that always keys with ‘title’, ‘link’, and ‘description’. There are more valid keys you can use in the Channel and the Item Element.
The JSON data returned from your API might not take that XML syntax into account and the keys might not match. This was my case so I first had to shape the JSON to rename the keys to match the keys for the RSS feed. Here is the Stackoverflow post that helped me write the code below ✌️
const JsonToObject = res.data.glossary.map(
  (obj) => ({
    item: {
      title: obj.Vendor,
      link: obj.Website,
      description: obj.Purpose,
      category: obj.Country,
    },
  }),
);
💡 When you check your response.data from your API call, you can map over the array of JSON objects, and with JavaScript change the values to the corresponding XML value.
You can take a look at my JSON in the Postman screenshot at the beginning of this tutorial for reference.
Convert your new object to XML with jstoxml
Now that you have the correct values in place, you can convert your JavaScript object to XML for the RSS feed. I chose to use the jstoxml plugin because it offers RSS feed support.
You can install the plugin with npm $ npm install jstoxml and require it at the top of the file above Axios.
const { toXML } = require('jstoxml');
const axios = require('axios').default;
Next, you adjust your data for the plugin according to their specifications. This is what it looks like for me:
const xmlOptions = {
  header: true,
  indent: '  ',
};
const feed = await toXML({
  _name: 'rss',
  _attrs: {
    version: '2.0',
  },
 _content: {
    channel: [
    {
      title: 'Example title',
      link: '<Link to RSS feed>',
      description: 'Example description',
    },
    JsonToObject,
    ],
  },
}, xmlOptions);
What I do here is that I first provide a title, link, and description to the Channel Element and then pass in my `JsonToObject` variable, which holds the shaped js object. The objects will be mapped over inside the JsonToObject function and the plugin will wrap each of the objects into Item Elements for you.
The jstoxml plugin will now turn your data into valid RSS XML format👏
Gatsby Static folder is where your RSS feed will live
The last step is to create a static file to print your new XML feed. If your RSS feed is supposed to live at the path www.example.com/test/list/rss.xml, you can create a folder inside your Gatsby static folder called test, and a folder within test called list. Keep the list folder empty.
This folder structure inside the static folder will create the first part of the path.
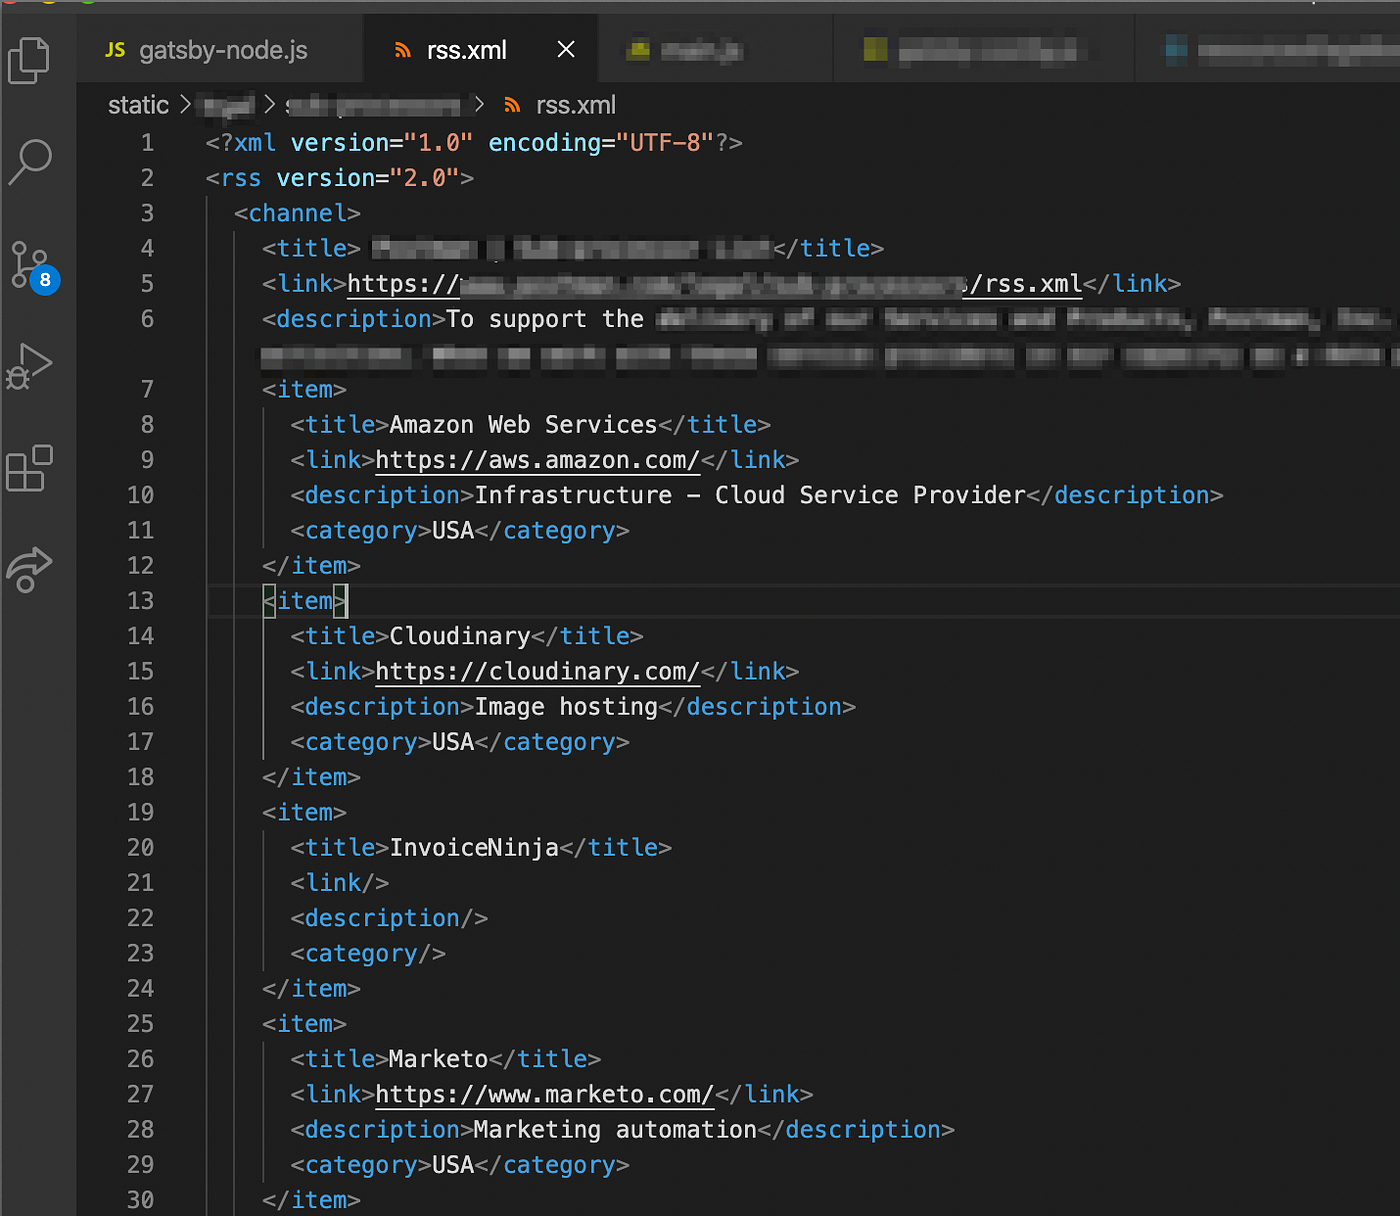
/rss.xml
You are now going to programmatically create an rss.xml file within the list folder by using fs.writeSync Method from Node.js. GeeksForGeeks has an excellent post on this method.
The fs.writeSync Method takes two or more arguments.
- The first argument creates a file at a specified location
- The second argument writes content into the newly created file
Here is my code:
try {
  fs.writeFileSync('<absolute path>/test/list/rss.xml', feed);
} catch (err) {
  console.log('Cannot write file!!!', err);
}
**Note:**👉 Do not forget to specify your rss.xml file so that it can be created in your folder. It is important to define the absolute path.
The second argument is the content for the file. In my case, feed is the variable I store my new XML data in (see code block above).
This method will overwrite an existing rss.xml file with new data every time it runs, which is after every build for us.
You can now run your Gatsby app with
gatsby build && gatsby serveand you will see the rss.xml file being created. You can now navigate to the URL you specified for your RSS feed to see it.
Pro Debugging Tip 🙋
If you get an error message that the file already exists, try closing and re-opening your terminal. If that does not work, try including this code into your fs method { encoding: ‘utf8’, flag: ‘w’ } like so:
fs.writeFileSync('<absolut path>/test/list/rss.xml', feed, , { encoding: 'utf8', flag: 'w' }Testing your RSS Feed
In order to test your RSS feed, I recommend pasting the URL or your XML Code directly into a RSS checker such as the W3C Validator 🚀
And that completes my tutorial 🎉 Congrats, you now have a fully valid RSS feed at a specific URL